This video tutorial shows how to log in with google on the ionic mobile app. Login with google plus on the android mobile app step by step.
Create blank project
$ ionic start MyIonicProject blank --type=ionic-angular
Then goto MyIonicProject folder and add platform
$ ionic cordova platform add android
Open config.xml and copy package name
<widget id="io.ionic.starter" version="0.0.1" xmlns="http://www.w3.org/ns/widgets" xmlns:cdv="http://cordova.apache.org/ns/1.0">
First goto https://console.developers.google.com and create project
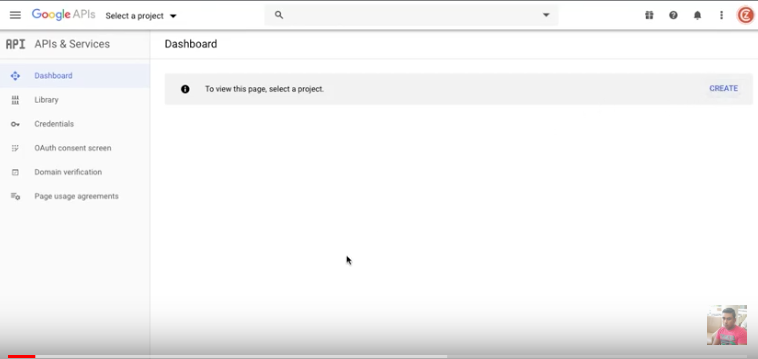
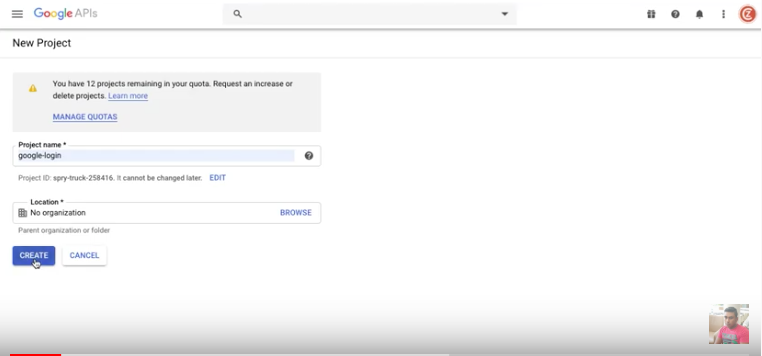
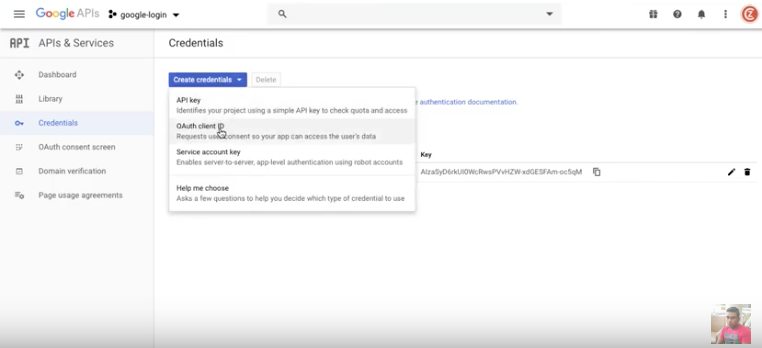
Select Application type , name and paste package name
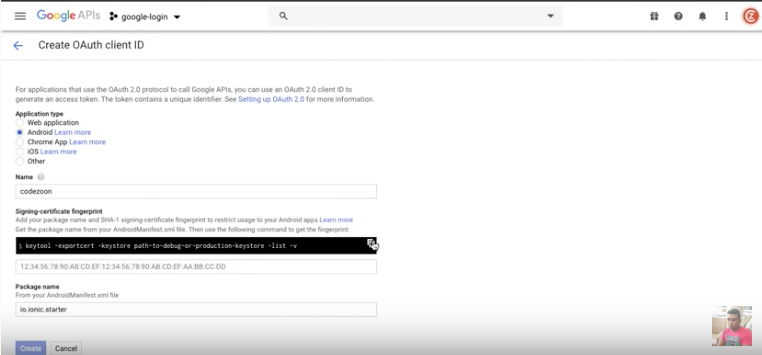
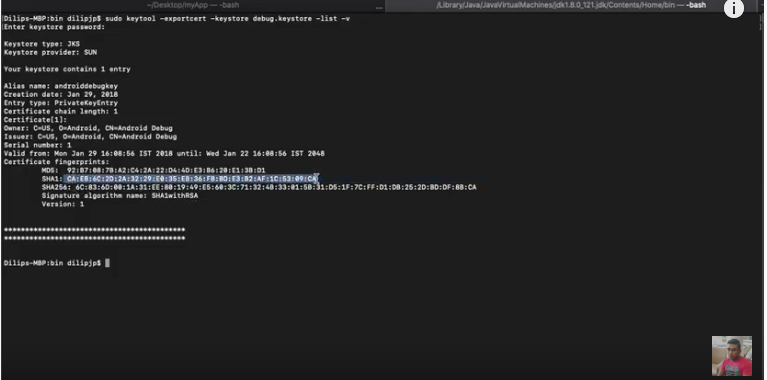
open terminal and goto java bin folder
/Library/Java/JavaVirtualMachines/jdk1.8.0_121.jdk/Contents/Home/bin
then run below command with admin access according your release and debug keystores path and alias-name
$ keytool -exportcert -keystore <path-to-debug-or-production-keystore> -list -v -alias <alias-name>
Ensure that you are using the correct alias name while generating the fingerprint.
Paste the fingerprint and create
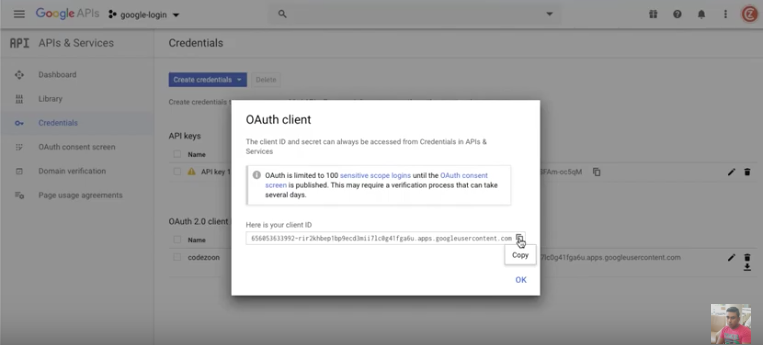
Now project has been done. then copy OAuth client and move to our project and run below command. make sure put your OAuth client instead of myreversclientid
$ cordova plugin add cordova-plugin-googleplus --save --variable REVERSED_CLIENT_ID=myreversedclientid
Next install npm package
$ npm install --save @ionic-native/google-plus@4Edit home.ts
import { Component } from '@angular/core';
import { NavController } from 'ionic-angular';
import { GooglePlus } from '@ionic-native/google-plus';
@Component({
selector: 'page-home',
templateUrl: 'home.html'
})
export class HomePage {
constructor(
public navCtrl: NavController,
public googlePlus: GooglePlus
) {}
login() {
this.googlePlus.login({})
.then(res => console.log(res))
.catch(err => console.error(err));
}
}
Edit home.html
<ion-header>
<ion-navbar>
<ion-title>Ionic Blank</ion-title>
</ion-navbar>
</ion-header>
<ion-content padding>
<buttonion-buttoncolor="light"(click)="login()">login</button>
</ion-content>
Edit app.module.ts
import { BrowserModule } from '@angular/platform-browser';
import { ErrorHandler, NgModule } from '@angular/core';
import { IonicApp, IonicErrorHandler, IonicModule } from 'ionic-angular';
import { SplashScreen } from '@ionic-native/splash-screen';
import { StatusBar } from '@ionic-native/status-bar';
import { MyApp } from './app.component';
import { HomePage } from '../pages/home/home';
import { GooglePlus } from '@ionic-native/google-plus';
@NgModule({
declarations: [
MyApp,
HomePage
],
imports: [
BrowserModule,
IonicModule.forRoot(MyApp)
],
bootstrap: [IonicApp],
entryComponents: [
MyApp,
HomePage
],
providers: [
StatusBar,
SplashScreen,
GooglePlus,
{ provide: ErrorHandler, useClass: IonicErrorHandler }
]
})
export class AppModule { }
Finally run
$ ionic cordova build android
$ ionic cordova run android
Publishing your app in Google Play Store
Google re-signs your app with a different certificate when you publish it in the Play Store. Once your app is published, copy the SHA-1 fingerprint of the “App signing certificate”, found in the “App signing” section under “Release Management”, in Google Play Console. Paste this fingerprint in the Release OAuth client ID in Google Credentials Manager.
Follow up with high-quality video tutorial on YouTube

hi Mr
can you help me please i have this problem msg erreur !
Your JAVA_HOME is invalid: C:\Program Files (x86)\Java\jre1.8.0_241
[ERROR] An error occurred while running subprocess cordova.
thnx
You have to find correct JAVA_HOME path where keytool exist
You have to set the correct JAVA PATH in system environment variables
JAVA_HOME “C:\Progra~1\Java\jdk1.8.0_XX”
You also need to include in config.xml
You also need to include in config.xml
hello bro, where I apply the code line “keytool -keystore path-to-debug-or-production-keystore -list -v”, in the application path or the java path?
in java path
Bro, you can runs the code in the path where is java, if you are in windows is in C:\Program Files\Java\jdk1.8.0_111\bin here runs the code